|
GekidoRising
|
 |
« Reply #20 on: May 22, 2015, 04:13:45 PM » |
|
ALRIGHT, now we're getting somewhere!  The sound clip The sound clip once again, for reference! Right now, every beat is the same size, as in there's no distinction between sixteenth notes, eighth notes and quarter note. In the future, I'll have programmed in the actual 'strength' of each beat and the rhythm bar will generate different sized bars depending on how long the beat is. Another thing that's missing right now is the rhythm highlighting which will be the system which, when the game figures out what rhythm you're following, darkens the other ones so that the rhythm you're playing to stands out! Also, those of who are familiar with Guitar Hero and DDR may be a little intimidated by the fact that everything is so squished together. Fortunately, the speed is very much adjustable, as shown with the faster speed below:  Also, something else that's been implemented into the bar is the 'consumption' (as I've been calling it) of beats which basically shows which beats you've hit when you hit them. Here's yet another gif in action of me alternating back and forth between the two rhythms (at a lower FPS because at recording at max fps with gifcam caused the game to lag a bit and eat inputs (which might need looking into)):  It's not a perfect science yet because as you can see, sometimes it will randomly grab notes from both bars instead of the same one over and over. The system I have for figuring out which rhythm the player is following is pretty loosey goosey at the moment so I might need to tighten it up a little bit. Once I get the highlighting implemented, it should be much easier to test which rhythm selection style is ideal! Also, on a slightly different note, I did some very lazy, quick doodles of Avadra!  She's literally so magical that she looks slightly different ever time I draw her! :C No but really, it's good to get some quick practice with her! I really do need to sit down and draw Avadra and Riff more often otherwise when it comes time to do the actual game art for them, they'll be nothing more than stick figures. With Avadra, I have some issues figuring out the shape of her maw and I also feel like her eyes move around just a bit every time I draw her. With Riff, I have a ton more drawing to do because I basically never draw humans 8S Also, this was my first time giving the Binary Pen a spin in SAI. I learned that downscaling the binary pen pretty much removes the entire effect so after I scaled it down, I redrew over it all over again. Feels weird to have the pixely effect actually, I've never gone for it before! |
|
|
|
« Last Edit: May 22, 2015, 04:28:26 PM by GekidoRising »
|
 Logged
|
|
|
|
|
GekidoRising
|
|
« Reply #21 on: May 26, 2015, 09:58:12 AM » |
|
The rhythm bar is complete!  I'm feeling really good to finally have a nearly finalized asset in the game. I'm so used to working with just placeholder art that it feels strange just to have something final. Who knows though, there will probably be some small changes that I make to it here and there in the future! Anyway, this was the last thing I wanted to do for this episode of development so all I have to do now is edit the footage together and then I'll be good to go. Now that I have the rhythm bar done, it's time to start implementing a bunch of really quick small systems that the game doesn't have yet. I'm not 100% sure what all that is yet, but there's definitely a few things so I'll probably be compiling a todo list soon. For now though, I might just quickly unwind with some drawing and then get back to business tomorrow! p.s. I love particles effects <3 |
|
|
|
|
Logged
|
|
|
|
|
GekidoRising
|
|
« Reply #22 on: May 28, 2015, 06:19:15 AM » |
|
New development episode up!  Simply put, this episode basically covers the implementation of the rhythm bar that I discussed in the last few posts! Now, onto adding stuff to that todo list! |
|
|
|
|
Logged
|
|
|
|
|
GekidoRising
|
|
« Reply #23 on: June 05, 2015, 11:01:43 AM » |
|
The rhythm mechanic is complete!Fortunately this time, basically everything that I had left to do with the rhythm mechanic can be easily summarized by one screenshot!  Simply put, over the past week, I: - Created a new beat set using this sample (visible on the right side of the rhythm bar)
- Implemented variable beat lengths (quarter notes, eighth notes, sixteenth notes, etc) represented by the bars being different sizes.
- Most importantly, implemented the ability to transition from one beat set to another!
Of course, the rhythm mechanic will never truly be 100% done. There are still a few very tiny bugs in it and there will always be improvements, but at this current moment in time, the rhythm mechanic is game ready! I go over all of the changes I mentioned above in more detail in the following devlog!  Finally, while just browsing tumblr, I came across a post that seemed all too relevant to GODHOOD, so I decided that I would reblog and doodle something up for it: 
|
|
|
|
|
Logged
|
|
|
|
|
GekidoRising
|
|
« Reply #24 on: June 09, 2015, 05:45:02 PM » |
|
Alright, I'm about half way through my odds and ends list right now, basically tackling things that are too small to call a features but are still very important mechanics. On the coding front, I've whipped myself up a quick config class! Instead of having raw tinyxml2 calls all over the place, now I have a class that conveniently takes care of all the loading, element access and saving. It has some nice perks too like only saving a config if changes were made it and above all, there's also the ability to add new parameters or even entire new config files from code. Seeing as it only relies on tinyxml2, I almost felt like I could upload the source except it's pretty (extremely) simple and I'm terrible for proper const correctness. It's nice though, because it's allowed me to quickly whip up configs for multiple parts of the game without having to actually write the XML. Here's what it generated for the BeatMaster: <Config>
<AudioLag value="160"/>
<RhythmBar speed="1.0" height="0.200000" width="0.80000" yPos="0.0400000"/>
</Config>
Gonna have to do something about those trailing zeros... Also, if you can't tell, I'm kind of a sucker for XML. I realize that this would probably be much more efficient if I just did the ol' plain text file sort of config, but I just find this way much prettier! After that, I (very nervously) added some new features to the collision manager. I've added protection for cases where characters spawn inside of each other to make sure they don't spawn stuck inside of each other. I also added support for phasing in such a way that characters can move through each other! Basically, dodge rolls or dashes like in the example below. (ignore the dots)  Thankfully the additions only took about a day to implement which is a MUCH better track record then how updating the collision manager has gone previously! Finally, I ended off today by getting the very (very very very) first implementation of an actual automatic camera!  Fun fact, now that Gifcam kind of causes the game to lag a little bit (a lot), I've resorted to recording the game using OBS and then recording the resulting video with Gifcam. At least this way, I'm guaranteed to get full 33fps on all my gifs! Kind of annoying though >:C Anyway, as you can see, the camera is currently not a really good working order. It's extremely slow and even has trouble keeping up with the character when ever they're falling. I figured that the best way to fix this would be to increase the speed it moves at as well as the distance it tries to lead the character. Unfortunately, if you like turning...  I can't say it's worked out the best. Definitely, this is something I'm going to need to put a little time into just trying things. Should be an interesting learning experience none the less! |
|
|
|
|
Logged
|
|
|
|
|
GekidoRising
|
|
« Reply #25 on: June 18, 2015, 11:12:37 AM » |
|
Finished implementing slow motion today! It turned out to be way harder to implement then I thought it would be but in turn, it’s resulted in a much more flexible system! Originally, my plan was to implement a system where the game would only have slow motion settings for half speed, third speed or quarter speed and for each setting, update the characters every 2nd, 3rd or 4th frame respectively, but still simulate their movement so that they move at 60 fps. This turned out to have quite a few complications centered around what order each component of the characters was being updated in. In the end, I managed to completely decouple the physics from the characters, allowing the two different aspects to operate independently of each other. On top of that, I’ve implemented a system where the game just reads the deltaTime and accurately keeps track of when it should simulate a tick instead of just updating every 2nd/3rd/4th tick. Here’s an example of the game running at 0.4096 speed:  Because the game now relies only on the deltaTime for updating the characters, that means I can not only slow the game down but speed it up too:  While the above feature is essentially useless for normal gameplay, the important thing to note about it is the fact that it’s using deltaTime! This is very important because it means that not only can this be used to simulate “fast motion”, but it can also be used on computers that have longer frame lengths, ie, lower frame rates! In other words, the game is no longer frame dependent and can now run at any fps, not just 60! This is good for me too because that thing I mentioned in my last post about needing to record with OBS and then Gifcamming the resulting video is no longer relevant! A small thing that I'll need to account for with this new feature will be what happens if someone has a low frame rate causing them to simulate more ticks, which lowers their framerate, causing them to simulate MORE ticks. I think simply clamping the max deltaTime down to a certain value should do the trick! Anyway, everything that I've mentioned above and in the last post as well is covered in today's episode of GODHOOD's development!  |
|
|
|
|
Logged
|
|
|
|
|
GekidoRising
|
|
« Reply #26 on: June 29, 2015, 06:22:59 AM » |
|
I was intending to get this written this past weekend but recently, I've entered the cat-sitting business and while Fluffy is cute, he has also been waking me up at night so I have been so tired lately ._. Anyway, last week, I finally got around to implementing Meter into character, which is basically a class that encompasses any sort of internal counter inside of a character, ie, a character's health or, in fighting game terms, a character's super meter. I've also set up a system to render a character's meter either in the game world relative to their position, or render it orthographically as a UI element.  To test if Meter is working properly, I implemented death animations into Waki and Smunch which are procced when they are hit and their health is zero.  Not the fanciest death animation but it's all placeholder anyway so it doesn't matter for now. Smunch's death anim is even less spectacular. Since Waki's attacks have no upward momentum, Smunch just immediately falls over and dies. In addition to completing Meter, I also got started on implementing something a little more on the graphical side: backgrounds! Since I have a habit of referring to everything in fighting game terms, I've instead been referring to them as Stages. Again, with everything being placeholder, I just wanted to get some basic assets rendering, so I quickly made some cubes and threw them around. Here's how it looks (at double speed, for brevity):  Currently, all of these items are placed with raw XML (including the cross which was previously just hard coded), which is fine for now, but down the line, when I start working on final game art, things will become much more tedious if I try to place every single element precisely with XML. So, for that reason, I've decided that I'm going to create for myself a very VEEERY basic editor. All the stage editor is going to need is the ability to: - Spawn objects from a list of stage objects
- Select objects from a mouse click
- Drag objects around to place them, scroll to move them in the Z
- Options to rotate/scale them
- Delete objects
The only thing I'm really nervous about on that list is implementing raycasting and mouse picking, and making the menu elements. For the former, I guess I'm just going to have to follow some tutorials. For the latter however, I've decided that if I'm going to need menu elements, then the next thing I'm going to need to implement into GODHOOD will be... Menu support! It's time to take a small break from gameplay programming and move onto a little bit of interface! I'm going to need to implement a main menu, pause menu, options menu and a level select. The options menu in particular should require some interesting things, such as the good old fashioned sliders, check boxes and drop down menus. Once I have those all done, there shouldn't be any problem at all implementing them into a stage editor (assuming I program them right)! On a final note, I have an episode for meter and stages already recorded but I feel like programming right now, so I'll probably just get started on all the menu stuff today and then edit the episode tonight. Probably for the better as editing and posting those videos eats up a surprising amount of time! You could argue that I shouldn't be doing them in the first place, especially with the low viewer count, but I can't help but feel that whether or not the game succeeds, it'll be fun to retroactively observe all the work that I put into it! |
|
|
|
|
Logged
|
|
|
|
|
GekidoRising
|
|
« Reply #27 on: June 30, 2015, 11:21:23 AM » |
|
I've gotten started on the main menu! I've spent a surprising (though not really if you think about it) amount of time implementing it because A) I decided I would do it right from the start and implement a fully polymorphic menu system and B) I actually realized that I haven't fully decided on some of the design aspects of the menu! I had an idea in mind but it turns out there was a few things I left unaccounted. Eventually, I felt that if I was going to make a final decision, I should sketch up a few concepts of how I wanted the menus to look. In the end, I came up with two different designs that I was stuck on for a little while: 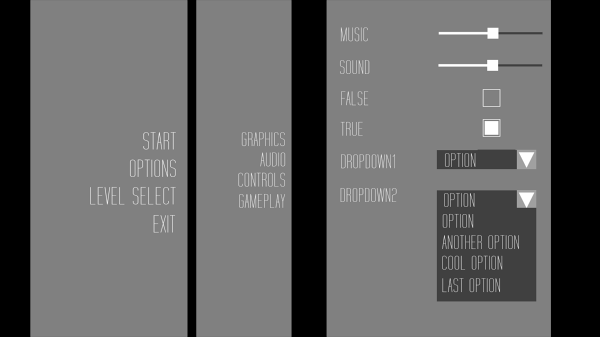 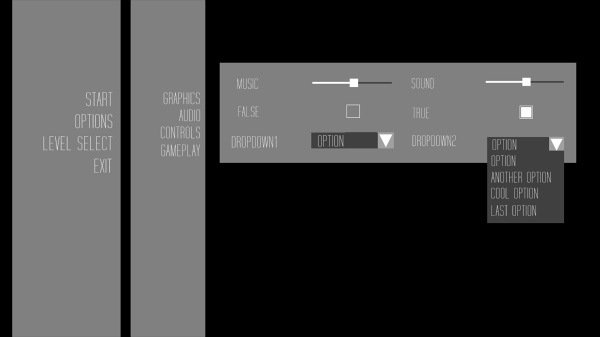 Before I go into detail on these menus, I'll say that I forgot to include a mockup of a crucial factor, the fact that the first scene of each level will display in the background, so the less space the menus take, the better! Anyway, on the top, we have the easier to program and navigate linear menus and on the bottom, we have the more compact and customizable menus. The top design was what I originally had in mind for the game, but I found for certain menus I want to implement in the future, such as one to customize the rhythm bar, I wanted to have a system where I could have every option on the same screen in a grid. While this does make things slightly more complicated (sliders would need to be selected before adjusting, otherwise you would just highlight a different option if you hit left or right), I found that I liked it better layout wise as well because it takes up much less of the screen and it allows for more intuitive layouts. You could argue that I could just shrink all of the menus in the upper concept but then I feel like it would make things somewhat lopsided. Anyway, that's enough of my reasoning. If anyway has any input on what they think would be better, I'd like to know! For now though, I've decided that I'm going to go with the lower concept for the better customizability. I've even already gotten started on it! I have to say, programming menus is oddly satisfying, it just fits into polymorphism like a glove. Here's what I got so far:  Definitely a ton of work to go, but at least the buttons work! My only gripe now is that it seems like Paint.Net has a different way of rendering text because the font looks more spindly in game if that makes any sense. Ah well, I'm sure that there's either some tiny shader trick or a way I can render out the text to buff it up a little bit! |
|
|
|
|
Logged
|
|
|
|
|
GekidoRising
|
|
« Reply #28 on: July 07, 2015, 09:53:30 AM » |
|
After a surprising amount of abject laziness, I finally got around to uploading that development episode about Meter and Stage which can be seen here: 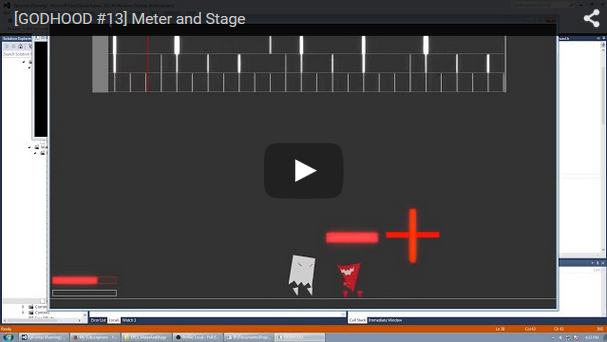 In other news, I've made pretty good headway on the menu elements, I've already gotten sliders and checkboxes implemented into the game! However, since I've discovered that there isn't much configurable with the game quite yet, it's sort of hard to design an options menu and the like so I decided I might wait until I get to the game phase to figure out what should all go there. Anyway, here's a quick view of how the different menu elements look at the moment: 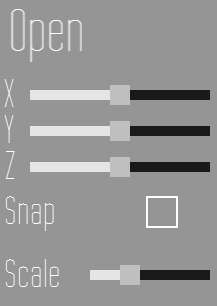 I have to say, while designing a UI system is fascinating in how perfectly it fits with polymorphism, I have to say it is also one of the more tedious sections of game development solely because of the sheer amount of configuration you can implement into each UI element. Each element already has a pretty decent amount of parameters to change and I haven't even touched stuff like font/fontsize or button/pressed/hover colors. Now, you may be wondering what's up with those options as "x y z" doesn't seem very elaborate. Well, to put it simply, I'm already half done creating a basic stage editor!  It's VERY basic and again, only half done as it still lacks the ability to spawn/delete objects or even save the scene. The rotation aspect also suffers from Gimble Lock because I'm a grumpy old man who shakes his cane at the quaternions on his lawn but apart from that, it is actually quite amusing to have such a thing at my disposal! I always thought that if I ever created an editor, I would have to invest weeks upon weeks into it (and for the more advanced aspects of my engine, that might still be the case) but no, I got this thing to where it is in only about 2.5 days of work. I'd say that it should be done in another day and half assuming the next UI element I implement doesn't go haywire on me. |
|
|
|
« Last Edit: July 07, 2015, 09:58:54 AM by GekidoRising »
|
Logged
|
|
|
|
|
GekidoRising
|
|
« Reply #29 on: July 15, 2015, 08:45:22 AM » |
|
Leaps and bounds have been taken in the stage editor! Fortunate for me, basically all of the changes as well as the stage I designed can be summarized easily in one screenshot: 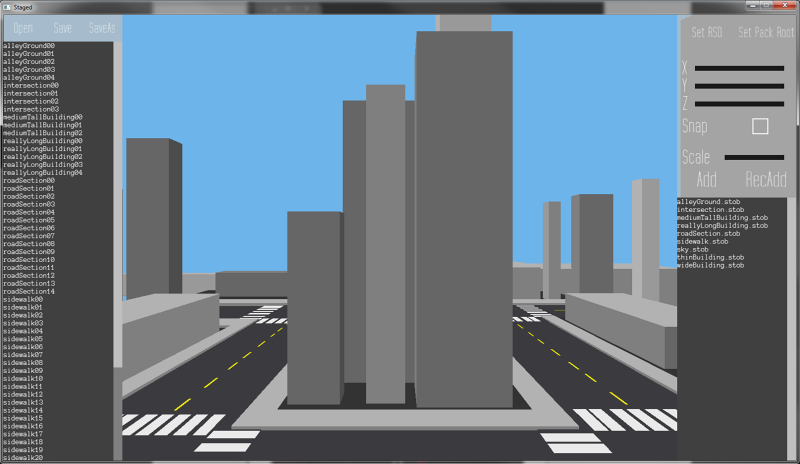 To keep things short, I have: - Implemented Text Lists, which is basically a list of selectable strings
- Implemented an asset list (on the lower right) from which you can select stage objects to spawn
- Implemented a scene object list (on the left) which is literally just that, a list of all the objects in the scene which can be used to select, go to, or delete specific objects in the scene
- Added the ability to load graphics resources from other locations (Set RSD + Set Pack Root)
- Added the ability to actually save the stage!
Of all the things I added, just creating the Text List took a crazy amount of effort. Just getting a scrollbar that behaves like a typical scrollbar was by far the hardest part and the math it uses to calculate what part of the list it should show when you scroll is not very pretty. It probably didn't help that I started it during my catsitting escapades and on the morning I started the scroll bar, I had gotten 2 hours of sleep. What matters now is that it's done and working!... for the most part! With the stage editor ready to go, it was high time that I started actually developing a stage with it. Rather then creating something extremely simple, I thought, why not create something a little more close to the final game? With that in mind, I decided to create a stage very loosely based on where the first level of the game is going to take place! Now before I talk about the stage itself, I have to say, something I sort of knew but very much learned when I started working on the stage; the best way to bug test your software is to use it like a normal person. In short, I ran into a lot of bugs creating that stage, and I even thought of a few features to add in the process (like a copy paste button which very much came in handy for spamming road sections and sidewalks. Unfortunately, the major downside to the stage editor at the moment: no undo. I figured that an undo button would be an extremely difficult thing to add because I'd basically need to create an opposite action for every action you could take, so I thought I would just omit it and deal without it for now. Still sad when you hit ctrl+z though and nothing happens. Anyway, after only about 1.5 hours of work, including the amount of time it took to create the stage objects in XML + texture drawing, I got the stage to the point it's at now. Here's how it looks in game:  A little (extremely) cartoony, I'll admit, and there are certainly a number of scaling issues, namely in the width of the road as well as the size of the actual city block, but seeing as this is all placeholder, it serves the purpose of giving me a really good idea of how big the stage will need to be once I get to the game phase! The big unfortunate thing about the stage now is that there is currently NO batching (that I've coded in the last year and half) in Fire2D, so while the game is fine in release mode, having 150+ drawcalls on debug mode is really taking a toll on the FPS. I don't know if it's clogging the graphics pipeline or if there's something in the standard library that I'm doing that just chunks the FPS on debug, but either way, eventually, I'm going to need to scrounge up some sort of dynamic batching. Anyway, now that I have stage behind me, it's time to move onto the next part of our engine: Cutscenes! This one, I'm fairly confident, will be a pretty quick task as half of it will be simply making a class that accepts an XML depicting "Show quad here, play this sound, show this subtitle, now show this quad" and so on. I have a very set plan on how I want to do the cutscenes, but I think I will go more in depth on them on my next update, once I have a little something to show. |
|
|
|
|
Logged
|
|
|
|
|
GekidoRising
|
|
« Reply #30 on: July 21, 2015, 05:32:34 PM » |
|
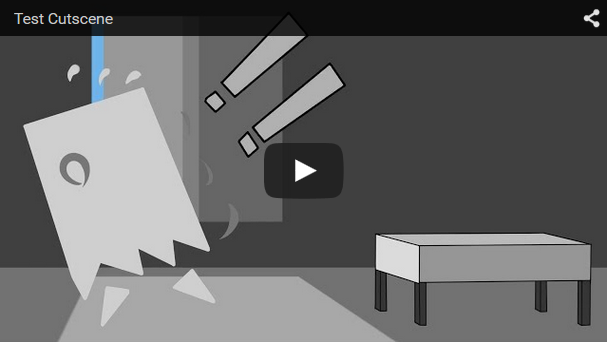
Got an episode up today on the progress I made with the menu elements as well as the stage editor! 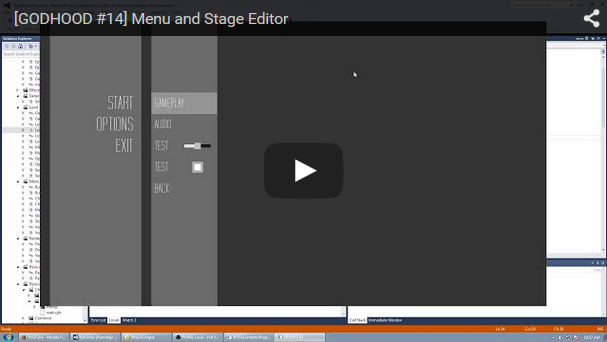 Also, I've been getting some work done on Cutscenes. It took me a while to decide what I should do to test them out, as in, should I make a cutscene about Riff and Avadra like in the final game, should I make a cutscene about Waki and Smunch or should I just go full deadpan and have a cutscene with pure test elements, ie "this is a quad", "this is a sound", "this is a subtitle", etc. The latter was way too boring, and while it would be fun to do some art of Riff and Avadra, it would unfortunately take too long at this point and it also wouldn't fit with what I've got, so in the end, I decided I would make a cutscene about Waki and Smunch. This unfortunately means I have to construct possibly one of the silliest, somewhat ham handed cutscenes known to man. With that said, I have the cutscene all storyboarded out with some even sillier art:  With that done, I went ahead and drew up all of the individual assets, which in short, is basically all of the Waki frames, the pieces of his """""house""""" and the accents/exclamation marks. Before I got started on the cutscene architecture though, I wanted to dress up what I already had! First off, I decided to give the loading screen a little bit more flare by adding the ability for fade in and out different images. Here's a quick example complete with tiny mouse pointer.  Right now it's literally screenshots of the game, but come time for the game phase, the loading screen will basically show artsy previews of what's going to happen in the level. Or they'll still be screenshots, depends how fast I am at drawing. After that, I decided to test out one other plan I had for the main menu; having the very first scene of the level in the background! Since this involves sound, I decided I would record a quick sample of how it looks 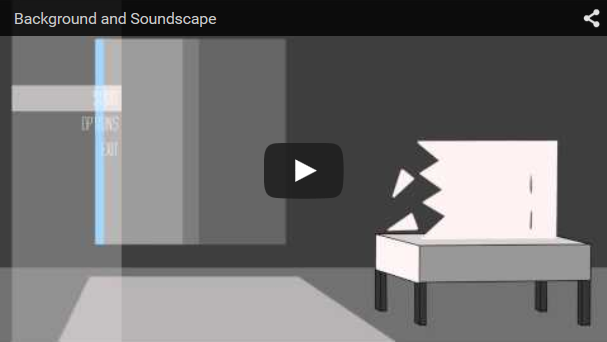 The idea here is the entire level is front loaded, and since the main menu is a part of the level, as soon as you hit start, it transitions right into the cutscene. I'll admit, I drew inspiration for this from the first Infamous game where the first time you push start, the second you push it, a giant explosion happens in the background, effectively kicking off the story (which is, more or less, pretty much the same way my game is going to start too coincidentally). Anyway, regarding cutscenes, I found myself really stuck for a while on how I was actually going to construct them. As I thought about it, I slowly came to the horrible realization that I was going to get stuck in XML hell if I were to just script entire cutscenes that way. It's a terrifying idea to watch a cutscene, find out there's a slightly misplaced prop, fix it in XML, than rewatch the entire cutscene hoping it looks better. As I thought about this, I was thinking to myself, "If only I had some sort of editor in which I could load objects, orient and place them in a scene and then save it to a file..." And then it hit me. 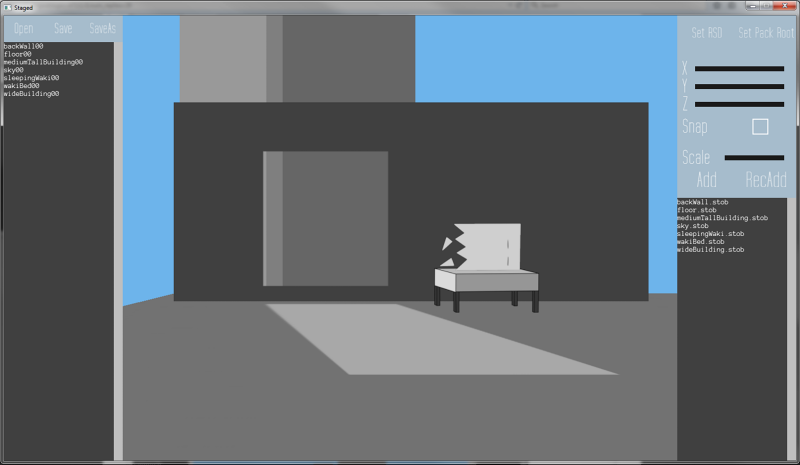 I already have exactly that! The stage editor! While it's not a full blown cutscene editor, it does present itself as a great way to neatly place objects. I just need to design Cutscene such that you can additively render stages on top of each other in such a way that one stage is the background, while another stage is simply the character frame! Anyway, I still have quite a bit of work to go on cutscenes yet and I haven't even started the gameplay cutscene yet. I'll probably give a more indepth explanation of that next post. p.s. for those of who are still reading, . |
|
|
|
|
Logged
|
|
|
|
|
GekidoRising
|
|
« Reply #31 on: July 27, 2015, 12:48:31 PM » |
|
 It may be painfully silly, but at least it shows that I finally have the cutscene architecture up and running! Took me a little bit longer than I would have liked but at least now I have a system where I can add new functions to the cutscenes very easily! Anyway, now that I've gotten that out of the way, it's finally time to move onto the next section of development and let me tell you, this next thing I'm going to be working has had me nervous for a really long time. I've actually spent much of today researching it but to little avail, it seems a lot of the examples online for it are rather specific. Simply put, next up on my plate: Artificial Intelligence.For the longest time, I've had absolutely no idea how I wanted to pull this off. I've been looking around everywhere for the different AI design patterns but they've been deceptively difficult to find! Right now, the only ones I've really been able to find/remember are Decision Trees, State Machines and Goal Oriented Something or Other. I think with the architecture that I have right now, I'm probably going to be leading towards decision trees, but how to pull it off, I'm still considering. Regardless, I'm extremely excited to get started on it once I have it figured out. Having AI in the game will be the biggest jump GODHOOD has taken to being an actual game in months, at least since I implemented the rhythm mechanic. On top of that, I only have basically two more features (one small and one big) before the engine is considered complete and I can move onto the game phase! Anyway, wish me luck! I'm going in... |
|
|
|
|
Logged
|
|
|
|
|
GekidoRising
|
|
« Reply #32 on: August 03, 2015, 03:05:56 PM » |
|
After much abject laziness, I've finally posted the cutscene episode of development (now with youtube's fancy new UI included)! 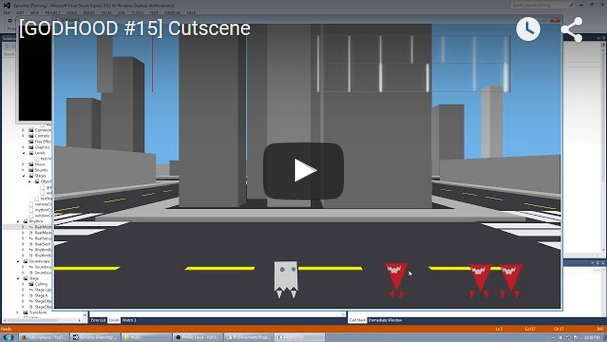 Anyway, now that I finally have the cutscene episode it's finally time that I get started on posting progress on the AI architecture in GODHOOD, which is to say... it's done! I'm super surprised but programming the architecture for the AI only took me a few days, and that's including the amount of time it took me to create a few states as well! I would have made posts about as I went through it but I went through it so fast that it just sort of flew by. Because of that, here's a not-so-quick summary of how it went: After much deliberation, I decided that the best course of action would be to stick to my guns and base the AI on a decision tree! Seeing as decision trees are a pretty well known concept, it didn't take me long to implement. On top of that, for the actual decisions themselves, I have the Condition architecture which the character's have been using since the very earliest days of the engine! Anyway, what I was more worried about though was how I was going to handle the actual states themselves. In the end, I decided that since the Smunch character already has all his moves based on keyboard input, maybe it would be best to base the AI on the same idea as well, having it simulate inputs rather then directly manipulating the character itself! I felt this would be advantageous because if I ever implemented a feature into one of the enemies that I wanted to test, I could just swap their AI interpreter for a keyboard interpreter and play the character myself! With that in mind, I decided I would get started and make a very simple chase state: If out of range, move towards the player. Here's the result (framed in a very strange manner because I was trying to get the file size below 1MB for tumblr and failed :S )  Despite kissing a little too close up to Waki, the AI works! Anyway, I decided I wanted to see what happens when I make so that if Smunch is range, he attacks instead of just stopping.  There was nothing left of him afterwards... Needless to say, it made the game literally impossible. I'm not sandbagging here, I actually made a serious attempt to play after that and I think I only got about two of them before I got obliterated. But hey, at least I have something attacking at all! Having that done, I decided I'd split apart the attacking into a separate state that gets switched to when the character is within range. Unfortunately, this led to much the same issue as above; every single Smunch would just converge on Waki as if he were a black hole. What I needed was some sort of messaging system that allowed the AI characters to communicate with each other so that I could create a system where whenever a Smunch would engage Waki, he would flag himself as "ATTACKING". That way, the AI units could just check how many other units were attacking and if there were too many on the offensive, the others would just retreat and watch from afar. This led to the creation of HiveMind, which is my very extremely simple system which allows a unit to select a Hive and send a message! While very simple right now (and not really optimized since every message is a string), I feel like this can come in handy in the future, such that I can have certain enemy types send messages to other enemy types, almost like a hierarchical command! Here's how it looked in the end:  Also, for those of who may be curious, here's how the XML looks for their current AI: <DecisionTree>
<States>
<Chase name="CHASE" distance="4.0" buffer="1.5"/>
<Cautious name="CAUTIOUS" minRange="15.0" maxRange="30.0">
<ExitCond cond="MessageCountLess" hive="Smunch" message="ATTACKING" count="3"/>
</Cautious>
<Attack name="ATTACK" attackChance="0.8" range="6.0"/>
</States>
<Decisions>
<If cond="MessageCountLess" hive="Smunch" message="ATTACKING" count="3">
<True>
<If cond="TargetWithinX" distance="6.0">
<True>
<State name="ATTACK"/>
</True>
<False>
<State name="CHASE"/>
</False>
</If>
</True>
<False>
<State name="CAUTIOUS"/>
</False>
</If>
</Decisions>
</DecisionTree> Anyway, bear in mind, a lot of these states are very likely to get changed in the future as well as the characters themselves for a variety of reasons. First and foremost, when in the Cautious (retreating) state, Smunch looks really weird literally just running away plus you can sort of get his AI mixed up and attacking in the wrong direction if you can get on the other side of him without getting too far away (because you're still technically in range of him). Long story short, come game phase, the wills are always going to face Riff. It should make things easier for both of us. Really, the states in general all need to get changed as well, because I really only created them for the intention of testing out the AI. There's still a lot more customization that I want to invest in the Wills once I actually get around the thoroughly designing them. Anyway, this post has gone on long enough! Surprisingly, there's still stuff I have yet to talk about even though it's really only been like one week since I last posted (almost exactly, wow) a message here. Rather than drag this post on into infinity though, I think I'll just make another post in a few days on the other feature I created last week as well as the big BIG things that are coming up this week! Needless to say, I am very excited for what's to come! |
|
|
|
|
Logged
|
|
|
|
|
GekidoRising
|
|
« Reply #33 on: August 12, 2015, 11:50:14 AM » |
|
Alright, finally got around to uploading the episode for AI! As I said, I was able to accomplish more than just artificial intelligence that week (which is now roughly two weeks ago, I'm really falling behind on these videos (but fortunately now's my chance to catch up))! I was actually able to implement the core for GameRule! But first, here's the video:  Anyway, GameRule! Despite it being something that drives the entire game, it's such a broad concept that it's core ends up being very lite so it only took me about a day or two to implement it as well as a few basic Game Rules! Simply put, a GameRule (originally I was going to call it System actually but I felt like that might be a little too ambiguous) is basically function that is updated alongside the gameplay and is responsible for every possible event that may happen during gameplay. While very simple at its core (literally just an Update method and that's it), it'll basically allow me to add any sort of core aspect or even some modifiers to the gameplay. The most obvious examples would be a GameRule that spawns enemies if there are too few, or perhaps a GameRule that ends gameplay after the player has defeated a certain amount of enemies (exactly the two GameRules that I've created to test the new system out). Off the top of my head, a few other GameRules I can think of are GameRules that: - restart/finish the gameplay section if the a specific character dies (the player/a boss respectively)
- restart/finish the gameplay section after a certain amount of time
- if a certain message is true, send a message to HiveMind in order to get the AI characters to behave a certain way
A lot of these things are actually going to be needed in the future too. All of the levels I have planned play slightly different from each other and have different criteria for when the gameplay section is complete. Anyway, that's all there really is to GameRule. With that said, I usually put a little spiel here at the end talking about what I have to work on next but the truth is, I'm so behind on these posts that I literally already have it done and I just need to post a log about it! Besides, this one might be best to keep secret until I post the log (probably within the next few days). To phrase a hint in the cheesiest way possible, let's just say that it's one of the most explosive mechanics to be added to the game! |
|
|
|
|
Logged
|
|
|
|
|
TankDuck
|
|
« Reply #34 on: August 13, 2015, 05:07:03 AM » |
|
Hey keep up the good stuff, really cool to see how passionate you are about this project
|
|
|
|
|
Logged
|
|
|
|
|
GekidoRising
|
|
« Reply #35 on: August 18, 2015, 06:40:21 AM » |
|
Alright, I've got the morning to cover this before the temperature climbs to 30C here so let's hope I can get this all out before I melt because I've been meaning to write a log about this for like a week now and I've been really looking forward to it too seeing as this is going to be one of the most important logs I've written so far! After months of building up to it, I have implemented: Explosive Attacks! I feel like I must have gone over this at least a few times before but just to give a refresher now, the explosive attacks (which I STILL need to come up with a less verbose name for) are attacks that player can perform on the heavy downbeats in a song. Think of something along the lines of a big dubstep drop, or maybe a heavy bass drum hit at the start of a [musical] measure. These attacks do much more damage than any other attack Riff has and they also come in many variations depending on what state Riff is in as well as what inputs you perform beforehand. Anyway, before I had started on Explosion, I was probably stuck for a few days just trying to figure out how I was going to even program it. For the longest time, I thought I was going to make a class just for explosion and then hard code every explosion such that I could get creative in code, but instead, I decided upon making a Projectile class. This is very advantageous because it means that I could give the enemies projectiles (or explosive attacks) of their own! Before I get to the fun stuff, a quick rundown on the Projectile structure. I'll preface it with this little factoid; a third option I was considering for programming projectile was to not even make a projectile class and just have the projectiles be characters of their own because functionally, projectiles are almost exactly the same as Characters in structure! Projectiles have different states (flying, impact, ect), and each state has a list of frames of animation (or not if you just make your projectile a particle effect but that's a different story). I decided against just using Character though, as projectiles do have enough differences that they deserved their own class. So, with that decided, I proceeded with probably THE BIGGEST copy paste job of my entire programming career, copying all of Character, Move and Frame into Projectile, ProjectileState and ProjectileFrame, a sheerly terrifying undertaking that I'm sure many programmers here know the horrors of. Thankfully, it went smoothly, for the most part! So, on with the juicy stuff! To test out the projectile class, I decided I would start small and easy and try and create the most well known projectile you can possibly think of, a fireball! That's super simple right, it's basically just a moving hitbox! Well, turns out it gets a little more complicated than that. Having just a traveling sprite that disappears when it hits something is easy, but then there's making it show a different sprite on impact, making it play a sound as it's traveling, ensuring that it gets deleted after a certain amount of time, so on an so forth. Here's the XML for just a basic fireball below if you're interested. <Projectile>
<Amalgam name="base.xgm"/>
<Speakers>
<Speaker name="default"/>
</Speakers>
<Voices>
<Voice name="loop"/>
</Voices>
<States initial="default">
<State name="default">
<Frames>
<Frame>
<Affectors>
<ApplyVelocity/>
<PlaySound maxActivations="1" voice="loop" sound="fireballLoop"/>
<If delay="300">
<True>
<Destroy/>
</True>
</If>
</Affectors>
<EntityQueue>
<ChildEntity name="body">
<InternalEntity>
<Quad>
<Corners>
<BottomLeft x="-2.56" y="-1.49" u="0.0" v="0.0"/>
<TopRight x="2.56" y="1.49" u="1.0" v="1.0"/>
</Corners>
<Material name="missileExplosionMat"/>
</Quad>
</InternalEntity>
</ChildEntity>
</EntityQueue>
<BoundingSets>
<HitboxSet damage="100" hitstun="10" hitFreeze="16">
<ReactionMotion>
<Knockback addX="19.0" setY="4.0"/>
</ReactionMotion>
<BoundingShapes>
<BoundingBox minX="0.0" minY="-1.0" maxX="2.0" maxY="1.0"/>
</BoundingShapes>
</HitboxSet>
</BoundingSets>
</Frame>
</Frames>
</State>
<State name="impact">
<Frames>
<Frame ticks="10">
<Affectors>
<StopSound maxActivations="1" voice="loop"/>
<PlaySound maxActivations="1" speaker="default" sound="fireballImpact"/>
</Affectors>
<EntityQueue>
<ChildEntity name="body">
<InternalEntity>
<Quad>
<Corners>
<BottomLeft x="-2.56" y="-2.63" u="0.0" v="0.0"/>
<TopRight x="2.56" y="2.63" u="1.0" v="1.0"/>
</Corners>
<Material name="missileImpactMat"/>
</Quad>
</InternalEntity>
</ChildEntity>
</EntityQueue>
</Frame>
<Frame>
<Affectors>
<Destroy/>
</Affectors>
<EntityQueue>
<ChildEntity name="body">
<InternalEntity>
<Quad>
<Corners>
<BottomLeft x="-2.56" y="-2.63" u="0.0" v="0.0"/>
<TopRight x="2.56" y="2.63" u="1.0" v="1.0"/>
</Corners>
<Material name="missileImpactMat"/>
</Quad>
</InternalEntity>
</ChildEntity>
</EntityQueue>
</Frame>
</Frames>
</State>
</States>
<Reactions>
<OnIntersection yours="ATTACK" theirs="BODY">
<ChangeState name="impact"/>
</OnIntersection>
</Reactions>
</Projectile>
Anyway, finally, here's how it looks in game!  Not bad! Now that we've got the basic stuff working though, let's move onto something a little more in line with GODHOOD; an actual explosive attack! Starting out, I decided that I would go with the most basic explosion you can perform, the neutral explosion, performed by being in a ground state while holding no directional inputs. Turns out, seeing as I had a fireball already implemented, an explosive attack wasn't nearly as hard, if not easier! Neutral explosion doesn't even have a travel speed, it just occurs and that's it! Appart from a few additions that needed to be made so that forces were properly applied to enemies, it was pretty easy to churn out:  I did a Waki sprite specifically for that explosion so that he would appear like a silhouette in front of the explosion which is an effect I want to get for the actual game, and as a result, he comes out looking rather demonic almost... which is PERFECT! Having fun at this point, I decided I would move onto something slightly fancier; side explosion, which is performed while holding left or right and standing! Turns out this one was even easier than neutral because I had literally everything I needed to make it! I just needed to create the XML and I was good to go:  Now that I had two working explosions, I figured it was time to go for the REAL fun stuff, so I decided I would create a more complicated explosion this time! Rather than ramble on about what it is, I'll just say that if you input a quarter circle motion and the explosion button, you get this:  This one took a little longer because I needed to create a system where projectiles could fire more projectiles but with this system in place now, I have the opportunity to get REALLY creative with these explosions and I'm really looking forward to it! All I have to do at this point is edit and post the explosion episode and than I have a pretty big announcement regarding the state of this project! I'm probably going to do that really soon actually because I really REALLY can't wait to post about it! |
|
|
|
|
Logged
|
|
|
|
|
GekidoRising
|
|
« Reply #36 on: August 20, 2015, 10:46:44 AM » |
|
Alright, I have the explosion episode all ready to go! You can watch it here: 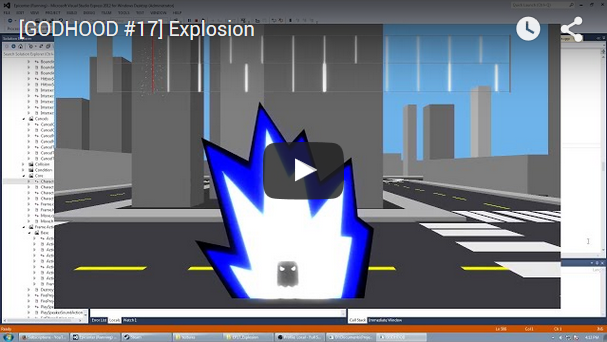 So, now that I have finished one of the most defining mechanics in the entire game, you might be wondering, what more could there possibly be to add to the engine? Well, the answer to that is... Nothing! That's it! That was the last core feature that I needed to add to the engine! I now have every single mechanic I need in place to start developing the actual game! To put it bluntly, the engine is complete! At least.. for the most part! There's still a ton of small code bits that need to be added, such as more complex AI states for the enemies, or more functionality in the Action/Condition system that Character uses in order to do neat things (like play sounds or summon projectiles). The thing with those though is the fact that each of them take anywhere between five minutes to a few hours to implement each! I am officially past the point of spending weeks on a single mechanic! Anyway, now that I have all of these pivotal mechanics in place, this means that I can finally declare the engine finished which means... It's time to commence the Game Phase! After (spread out over a period of) 2 years, it's finally time to put my art and design skills to the test and start creating the actual game! With the majority of the coding behind me, I can now directly focus on game design, art, story, balance and every other aspect of creating a game that isn't code! Honestly, just getting to this part of development has been absolutely bizarre for me so far! This phase of development always looked like it was on the horizon and for years, it just seemed like something I was going to fantasize doing but never actually get to, but alas, here I am! I am extremely excited to see how things go because now we're getting to the fun stuff! Anyway, as I've been saying, I've sort of formed a backlog here and by posting that episode and making this announcement, I've officially caught up which means that I sort of have already been in the game phase for about the past week and a half now! What this means though is that as I crank out art and design, I should be able to post here more frequently with shorter posts since these longer posts really take a lot of effort to write out! Besides, I'm starting to think that people are less inclined to read these walls of text so it should work out for the better, haha. Anyway, for now, I've just been doing warmup drawing (since it had really been a while since I had done a lot of drawing) and a few concepts for the game. So far, my first priority though is to create something this thread has needed for a long time; A gameplay mockup! So far I have it mostly done and I'm already learning about a ton of stylistic decisions that I'll have to make later on. I was hoping to have it done by the end of the week except the temperatures we've been getting lately are making drawing impossible. It's been 30C (which I realize isn't so bad for some of you but when you're Canadian, it's a world of difference, plus the humidex doesn't make things any easier) for the past few days and it does not making drawing easy when you're sticking to your tablet, but I was thinking I'll just work into the weekend to make up for the time I've lost in this weather! Anyway, there's still a ton more that I need to go over and I definitely still have a lot that I need to figure out. In fact, I'll probably be coming here (or at least the relevant board) in the future for some advice, but I'll save all that rambling for another post! For now, I'll just be happy and officially declare: The Engine Phase is complete. The Game Phase begins! |
|
|
|
|
Logged
|
|
|
|
|
SunWuKong
|
|
« Reply #37 on: August 20, 2015, 01:25:42 PM » |
|
Tracking this one! Looks very interesting and fun!
-Tim
|
|
|
|
|
Logged
|
|
|
|
|
GekidoRising
|
|
« Reply #38 on: August 25, 2015, 06:03:07 AM » |
|
I meant to say, thank you TankDuck for the support, and also a good thanks to you SunWuKong! It's definitely a pleasant sign to see people behind the game! On top of that, things should become very fun in the coming months as things get a little more interactive here too!
Alright, it's been a good two weeks now and after a great amount of drawing warmup and incredibly hot weather, I've finally completed the first gameplay mockup for GODHOOD: 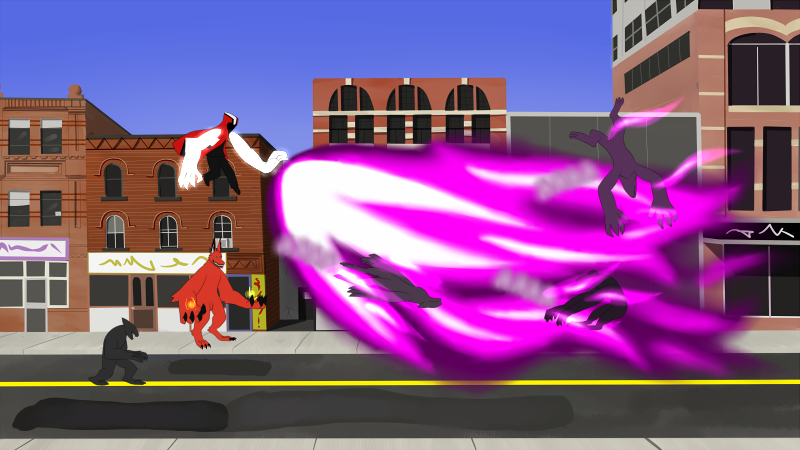 (click for full view) The above version is the version without lighting effects. My plan is the moment the explosion goes off, for a few frames, the game will have lighting like this: 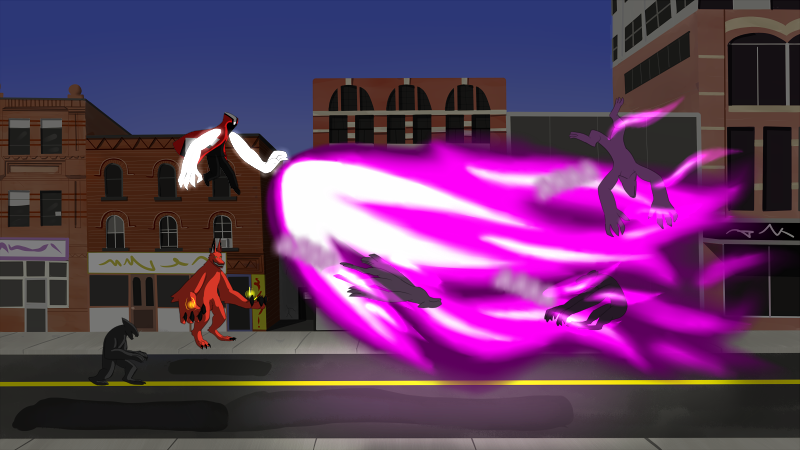 (again, click for full view) I'm pretty happy with how this looks, though I will admit I did get somewhat progressively lazier drawing the buildings from left to right! A fun fact about that, since I have little experience drawing buildings, the day after I completed the engine, I decided I would go and take photos of all of the historic buildings downtown! Many of the buildings you see back there are directly inspired from them. On the character sizing, I feel like I might actually make the characters a little smaller yet! I want there to be a lot of real estate regarding how much the player can see around them due to the high range of the explosive attacks. Also worth mentioning is the stylization of the explosions themselves. I actually have a few different ideas on how the explosions look. I actually have an alternative version of the mockup that you can view here:  I'm still not 100% decided on which version I want to use for the game, though I am leaning towards the blurry version as it would blend together better with particle effects. Still, the hard edge style might be easier to animate although I am not entirely certain! I definitely still have some playing around that I need to do. On a side note, it honestly STILL feels so strange to be in the game phase. Now that I have the mockup done, I've come to the realization that I could do literally whatever I want next. There is no clear cut order for this, I could move onto whatever I feel like at the moment, be it writing out dialogue or animating Riff or designing explosions! Honestly, it's an overwhelming feeling, but strangely wonderful at that! |
|
|
|
|
Logged
|
|
|
|
|
nathy after dark
|
|
« Reply #39 on: August 25, 2015, 07:31:37 AM » |
|
This looks like a really cool game! I'll definitely follow your log and check back later to catch up on the progress you've made. Are you going to open source the engine? I've never worked with dynamic sprites and it would be really cool to see how you're doing things.
Your game reminds me of One Finger Death Punch which I've been hooked on lately, and Crypt of the NecroDancer which I've wanted to play forever but I don't have a dance pad. Have you played either of them?
|
|
|
|
|
Logged
|
|
|
|
|
 Community
