Hey!
I wrote a blog post a week ago about the technique I came up with for creating pre-rendered characters and animations for an unreleased HTML5 game. It was quite the learning process for me, so I figured some TigFolk could find it useful or at the very least, interesting :D .
Original post http://iaingillespie.tumblr.com/post/45615146942/squaddiesbodiesSquaddies BodiesAlmost a year ago we began work on a game called at PLA Studios. The PLA team, including @v21 and myself, pitched a game idea for a TIGA competition. The game is an isometric Shoot and Loot ‘em up with the ability to upgrade and customise your squad.
We won the competition and received the funding!
A couple of things to note:
Squaddies is a 2D isometric game
It is an HTML5 game
There are to be MILLIONS of interchangeable body parts and weapons 0_0
When deciding how on earth we were going to create and animate all these body parts and weapons, we looked at a couple of different ways, one of which being using Flash to make the Base animations, then rotoscoping over them with the new parts and accessories. This seemed doable but when we calculated the amount of time it would take for me to do all these animations by myself, it was ridiculous, and it completely disregarded backgrounds and all other artwork. The other method was to model and animate everything in 3D, render it out, and somehow get everything to fit together. After having a look at this method, I decided it was probably going to be the most time efficient. This blog is about is how I went about using this method efficiently. This blog is also a potentially useful tutorial to show how to implement some kind of character customisation element into a game.
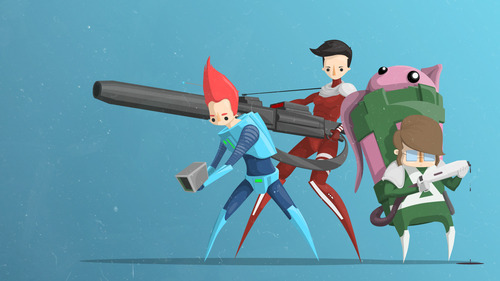
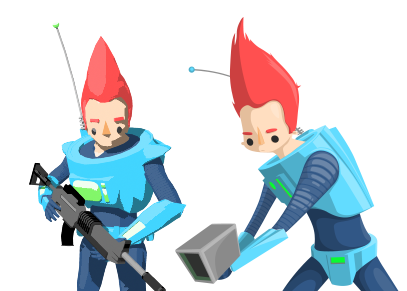
As the development went on, we decided that there would be 3 classes to choose from in your squad: Assault, Ecto (area attack) and Heavy. I also designed 4 different squad themes. These are Default (unimaginative name), Lumberjacks, Bionics, and Road Warriors.
Assault Ecto
Ecto Heavy
Heavy
I’ll talk mainly about the Assault class here, as it was the first I got to work on.
Firstly, we got the Default Assault guy modelled, rigged, and animated. I then plopped each of his limbs and his gun into a separate Render Layer along with the ambient light. One thing to bare in mind is that you need to set the fps to 12 frames per second. This cuts down on the amount of frames that go into the spritesheets.
I had quite a bit of fun mucking around with the Ramp shaders in Maya to get the guy to look like he did in my original concept and got there in the end. It looks cool!
Assigning the ramp shaders to polygons also meant that I didn’t have to unwrap the UVs for anything (which as everyone knows, is messy in Maya).
The next thing to do was put in the 8 isometric cameras to render from. Simple enough! Google isometric, and we get the angles at which the camera needs to be placed
http://en.wikipedia.org/wiki/Isometric_projectionLooking through the camera I made sure that it focused on (in my case) a sphere at 0,0,0 in the scene. I also had to make sure that the camera was changed to an Orthographic one in the Attribute Editor. While there, I also set the Orthographic width to a suitable number and then locked it. I find that sometimes it’s easy to forget you are looking through your created camera and not the perspective camera and go moving and zooming about all over the place! I locked the orthographic width to prevent the zooming, which in this case is important as we don’t want the character scaling as he turns from one direction to another. Once I set the coordinates of the camera to an isometric position, I locked up all of the attributes except the Y Rotation.
Next, I relocated the camera’s Pivot point to the very center of the scene. From there I duplicated the camera and rotated it 45 degrees, repeating this step seven times until I had the 8 cameras. I then went and locked up the remaining Y Rotation attributes.
I then came across a problem. The light! If I rendered all of these out, as the character moved about the screen the light would always be cast on one particular side of him. The solution we came up with was to create 8 different Maya files, each with one of the 8 different cameras in it. Included in each of these files, the light was parented to the camera. In this way the light would always be cast from the top left of the image. Once a character was ready to be rendered, we duplicated these 8 Maya camera scenes and then imported in the specific character.

I designed all of the characters to be like little action figures so that all of their joints would be ball joints like a Gi-Joe or Action man.This way everything could be swapped in and out, rigged and weight-painted very quickly. As long as the shoulder, elbow and wrist were in the same place, the contents of that arm could be anything. It also didn’t really matter if the geometry passed through one another in the scene, as they’d all be rendered out separately and put back together in the HTML! Right, now I’m getting ahead of myself.
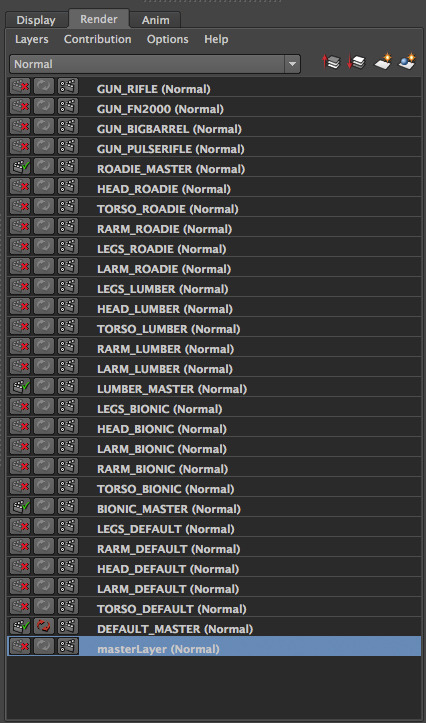
Once a new body part was modelled, it was then bound to the rig and put in it’s own respective Render Layer. The Master layer looked like this!
Finally, it was time to render. With quite a list of body parts and weaponry in the scenes, it was bound to take a little while. We tested some different rendering options, including using MEL scripting and even manually rendering out the frames. The latter was fine for the testing, but certainly would not do for the real thing.
Here’s the Render Layers.. Yikes!
We didn’t want to have to have someone manually start all of these renders and name them individually, so with the help of @vorrintal we set up a super sweet automated rendering method!
It involved using mac OS’s Terminal to access Maya to render everything for us without even having to see it’s gray UI

. I am in no way a coder, so I found this all very cool. Once, I was given a code template, I went about typing out all of the names and frames for each animation.
Here’s the line for the Idle animation in the DOWN camera scene:
/Applications/Autodesk/maya2013/Maya.app/Contents/bin/Render -r sw -im “ASSAULT_RENDERS/<RenderLayer>/IDLE/<RenderLayer>_<Camera>_UP_IDLE_ASSAULT” -s 001 -e 030 -rfs 1 ~/Dropbox/SQUADDIES/MAYA/ASSAULT_ANIMATION/ASSAULT_RENDER_SCENES/ASSAULT_RENDERS_DOWN.mbI really recommend this method for rendering out anything from Maya as I found it to be far quicker and user friendly than dealing with Maya’s somewhat confusing Render settings.
To write and edit this code, I used the lovely Sublime Text, which is very nice on the eyes, (especially non coder eyes).
To run this script from Terminal, I first had to make it an executable file. To do this, you change the directory to wherever the code’s .sh file is stored. (For example, mine was
Dropbox/SQUADDIES_OUTPUTS/COMMANDS). Then type “chmod a+x” then the filename of the script. Hit return and it’s ready. To run it I type “./ filename” and return.
Then (depending on the speed of the machine) you get thousands of lines appearing in the Terminal window, and a fresh directory filled with lovely PNGs.
Once everything was rendered out, I used Texturepacker to create the spritesheets and their accompanying .json files. With all of the spritesheets done, I handed them to our programmers to put into the HTML5 engine they had created. They spent a fair bit of time organizing the layering so it was looking pretty sweet! (Let’s use the character’s head as an example for layer ordering. Depending on which of the 8 directions he is facing, the head may have to be in front of, or behind, his torso.)
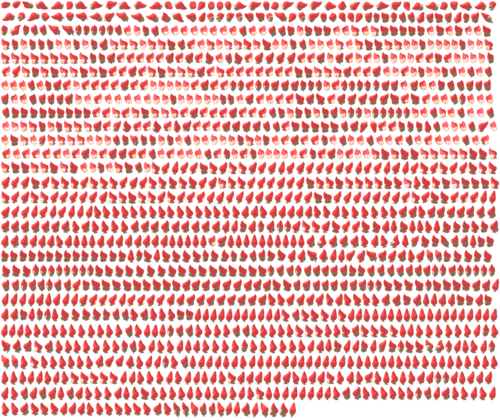
Here’s The Assault Default’s head sheet
SO, in the end, this was the process in which we rendered out every body part, weapon, and NPC. There is a lot more to be said about the actual construction of the game, but for this post I really just wanted to concentrate on the process I went through to get the character art into the game.
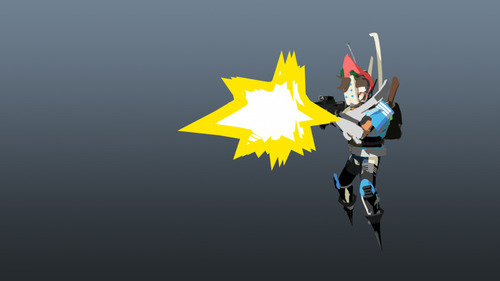
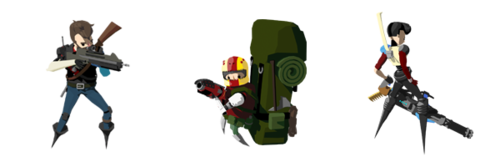
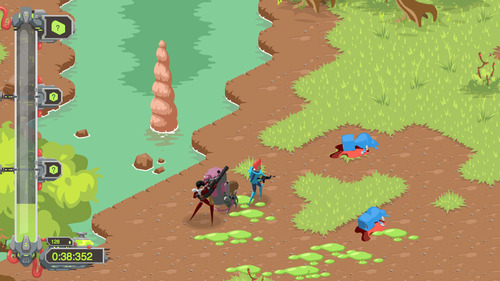
Here’s some examples of the combinations and a screenshot of the latest build of the game
..and that's the article. It'd be great to hear any your thoughts on it
 Developer
